
Thank you to EA Game Changers for sending me an early access code for the Eco Lifestyle Expansion Pack!
Now, I’m not an expert builder but I’ve really been enjoying making small homes lately, especially container style builds since getting Strangerville and Tiny Living Stuff. I was excited to finally get proper container walls, floors and doors and it’s interesting to see all the builds players have been putting on the gallery already! But maybe you want to build your own lots and you’re not sure where to start? Well I’ve put together a handy step by step guide to walk you through it!
Here I’ll show you the basics of how to build two types of modular homes: shipping container style and ‘flat pack’ pop-up style. you can build both on one lot at the same time as practice, or you can follow the guide for one at a time. They’re quick and simple to do, so let’s get started!
Step 1: Make A Box!
I know, I know, we’ve been trying to build things that don’t look like boxes since The Sims 1! But a rectangle is the basis of this build. Think Lego! I start both styles by building a 3×6 box in Build Mode. You can adjust the size, if you like, but since the new container door is 3 tiles wide, this seems like a good size for me. The key, however, is to keep all the boxes the same size.
You are also going to want to reduce the wall height to the shortest size.


Step 2: Copy the Box!
The Sims 4 has a handy little copy tool that allows you to duplicate entire rooms. Click on the room you just built and find the copy icon. Then place a second room somewhere else on the lot. These will act as the starting blocks for our two builds.
(You may need a larger sized lot to practice on so you have plenty of space to build both houses. I’m using the large lot in the Foundry Cove area of Willow Creek. Use the ‘bulldoze’ tool to clear the lot.)


Step 3: Choose Your Wall Coverings
You may find it helpful here to use the filter on the bottom-right side of the screen here and choose the Eco Lifestyle expansion under ‘packs’. This will help you to find the content.
The shipping container home will use the ‘Panel to the Metal’ wall covering, you can choose whichever colour you like by clicking on the colour swatches on the icon. Place this all around the first room.
Tip: You can decide if a wall covering is applied one tile at a time or around a whole room. You can find these two options as icons above the different wall covering categories. If you choose single-tile, you can easily paint the whole room at any time by holding the ‘shift’ key as you click the wall.
The Flat-Pack home will use the ‘Smooth Panelling’ wall covering. Apply this all over the second room.


Step 4: Choose a Floor Wisely
You can use the up and down arrows on the top-right of the screen to move up and down the floor levels. Change this so that the grid shows on the top of the two rooms.
Tip: You can toggle the grid on and off by tapping ‘g’.
I picked the ‘Layered Flooring’ floor tile for the roof of the container. You can apply this directly to the topside of the room, no need to use the ‘roof’ tool.
For the Flat Pack room I used the orange-coloured swatch of the wood pattern called ‘Slatted Wood’. Apply this across the topside of the second room.
Tip: You can change the direction of the floor pattern by tapping ”. I like to rotate the tile on the shipping container so that the pattern lies across the width and rotate the tile on the flat-pack home so that it runs along the length. It just looks better this way to me.


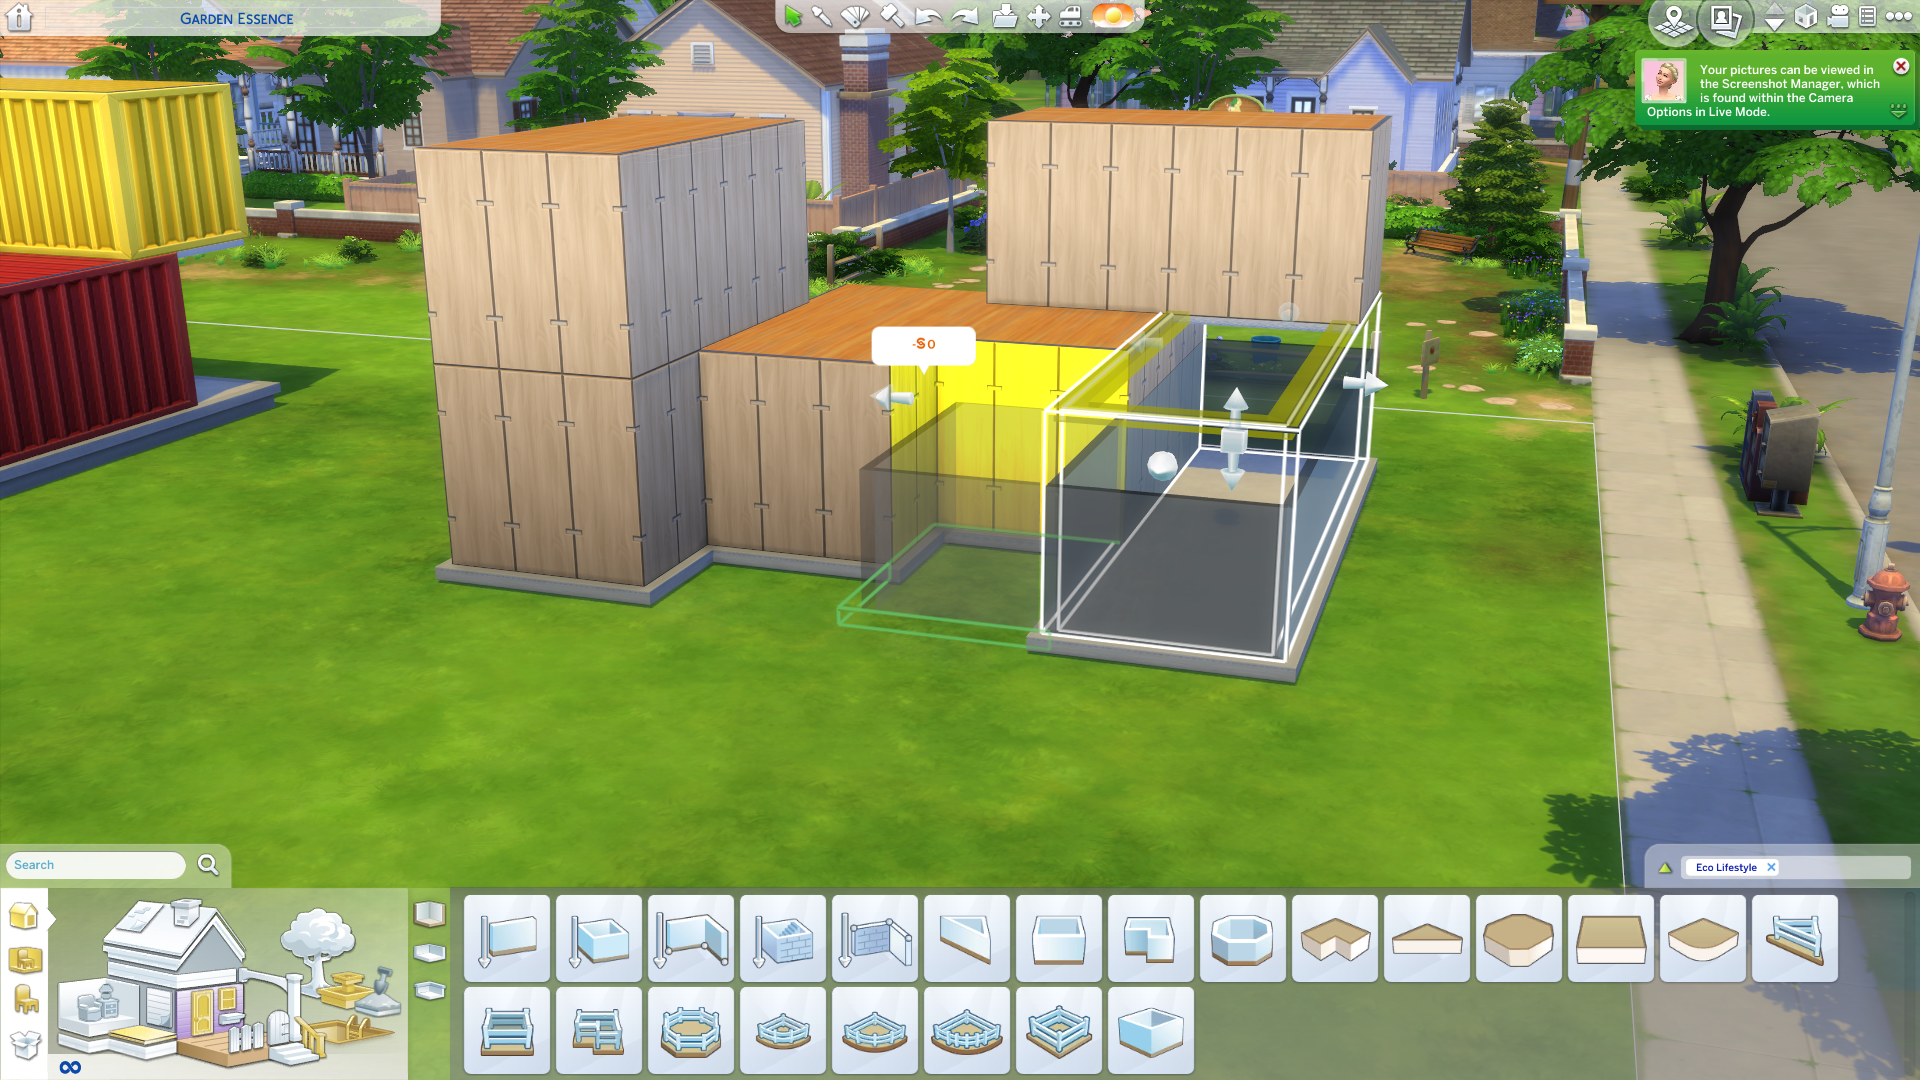
Step 5: Raise the Foundation
At this point you should move the two rooms apart so you have plenty of space to build each home. You can do this by clicking on each room in turn and using the arrow icon on the UI to move the whole room.
Next, click on the container home and you should see something that looks like two arrows attached to a cube. Click on this and move the cursor up and down to raise or lower the foundation. You can make this as high or low as you like. However, I chose to raise the container home by two notches and the flat pack home by one notch.
The reason why I do this early on in a build is that sometimes the game can be a bit stubborn and refuse to change the foundation height later as build become more complicated.

Step 6: Add More Blocks!
Now we’re going to pretend we’re kids again with those chunky Lego blocks! If you wanted to, you could keep the build super-small, for example if you wanted a cosy starter home or you wanted to try to build a tin home with Tiny living. You can also go crazy and add as many blocks as you like within the game limits.
I like to work in odd numbers as I think this makes the build look more quirky and realistic. However, you can also choose to build symmetrically, if you prefer.
Another key tip is to place each block a couple of tiles forward or backwards from the first, this helps to keep the ‘blocky’ look of container builds. It is also good to rotate one or two of the blocks to give the build a higgledy-piggledy look.
Tip: When holding a room, use the ” key to easily rotate it!
Ready? Click on the container room and choose the ‘copy room’ icon as you did earlier. You can place a second room down and keep repeating this process until you have placed as many rooms as you need. I placed 3 rooms for the container build as so…


For the Flat pack home I placed 5 rooms like this…


Step 7: Brighten Things Up
You can keep the container homes to their original colour or you can take a moment to brighten them up with different colours for a more cheerful look. Paint each room or block individually as in the image below. Remember you can either place the wall covering by a single tile at a time, or as an entire room, whichever is easier for you.
You will also need to find the matching floor covering and match the walls and the ‘roof’ of each room to make it look like each room is a separate container. Remember you can rotate the floor tile when holding it by pressing ” so that the tile runs across the width of each room.
I prefer to keep the walls of the flat pack home all the same colour for a more consistent, modern look.


Step 8: Add an Outdoor Area
Under the ‘walls’ category you can find a square room with no walls (highlighted in the image). You may need to add ‘base game’ under the pack filter to see it if you filtered for ‘Eco Lifestyle’ earlier.
Place this anywhere where you plan to put a door. You can adjust the shape by clicking on it and using the arrows to drag the sides around. You can also place more down, if this makes it easier to build the shape you want. If you go wrong, don’t worry, just hit the ‘undo’ arrow at the top-centre of the screen.
On the container I placed a small platform at the back and front of the build. Like so…


On the flat pack home I placed a platform under the overhang and then pulled it using the arrows to wrap it around the front of the house. Like so…


Step 9: Foundation Styles and Borders
Now you have finished building the general shape of the houses, you can start to add some detail.
I feel like the overhang on the container needs some structural support. Look for the ‘Industrially Tested Trim’ and place this around the edge of the overhang ONLY. This might be a bit tricky but here are a couple of tips to help you.
Tip: You can add small sections of trim at a time by holding the ‘shift’ key while placing them.
Tip: Trims automatically apply to the length of the room, so if you want to add a smaller section, build an interior wall where you want the trim to stop. After placing the trim, click on the wall to remove it.


Next, I added a metal column called the ‘Steel the Show Pillar’ to the corner for some more support. I did not add a column to the overhang of the flat pack build but you can if you want to.


Now to choose a foundation style! I used the base game ‘Stilt Foundation’ for both buildings. For the shipping container I chose a metallic grey colour, and for the flat pack home I chose black. The foundation will apply room-by-room, so you will need to spin the lot and check that it has been applied the whole way around.


To complete the outside of the container home, place some stairs against the front platform, you can make the stairs wider by using the arrows. Then choose a metal floor tile and cover the platform at the front and the back of the house.


Step 10: Add Some More Detail
On the reference image I used to build the flat pack home, they had some kind of awning on one end of each block/room. To get this look, I used the wall-less room from when we were placing the outside patios. I created a 3×2 rectangle and placed this at the end of every room. Once you have created the first one, use the ‘copy’ tool to easily place the others. If you get a tricky section, place the piece on the roof and drag it with the arrows until it sits in the correct space.


Next we’re going to use the wall-less room again to cover the whole roof area. You need to do both the middle height and top sections. The reason why we need to do this is because we’re going to add a wall trim, but the game needs to recognise each room as a ‘room’. Adding this wall-less floor will do that.
You may lose the floor patterns from the top, but don’t worry too much, we can reapply these.

Now add the same orange wood to all the sections of the roof. I place it by tile rather than by room so that I have more control. First I do all the tips we added to the end of each room. Then I apply it to the lengths of each roof. Make sure the pattern is running length-ways each time, you may have to use the ” keys to rotate the floor tile.

Next, I add the plain black ‘Jutting Exterior Trim’ to all the middle and top edges like this:


Finally, I changed the roof section that DOESN’T overhang on the middle level to a darker coloured wood. This will be a patio area. Make sure you leave those overhanging tips orange. Then cover the outdoor platform area with the same dark brown wood (stone also looks good for the bottom layer).


Step 11: Windows and Doors Oh My!
For the first build I used the ‘To Be A Safe – Door’ shipping container door. I added one to the front and one to the back of the build over the platform areas. Ideally you want to place these on the ends of the rooms for that proper shipping container look. Make sure you match the colour of the doors to the exterior wall of the room.


Next, choose one of the large 3-tile industrial windows from Eco lifestyle and place these on the overhanging edge of the top room, and the remaining ends of the lower rooms.


For the flat pack build, I like to use the tall single-tile Eco Lifestyle windows in black. Place one of these at both ends of every room.


I like to use a base game door for the flat pack build but you can use a fancier Eco lifestyle door if you prefer. Place one under the overhang as an entrance and then one on the side of each of the upper rooms leading out to the patio area.

Step 12: Placing Ladders
You can add a staircase if you prefer but ladders take up less room. When placing ladders I’m careful to avoid putting an open hole in the roof as realistically, you wouldn’t want rain coming in from the outside! So I like to have them going from outdoors to outdoors or inside to inside.
I also like to place them so that they lie flat against the wall on both the lower and upper level.
The good thing about ladders in The Sims 4 is that Sims can climb off them from three sides, so as long as one side is clear they are usable. You can see which sides they climb off as there are green arrows at the top of the ladder hole when you click on them, as in this image…

On the flat pack build I added an exterior ladder next to the entrance and an interior ladder in the back corner as you can see here…


For the container build I added a ladder in the back corner…


Step 13: Fences
To complete the exterior of the flat pack build I used the new solid fence from Eco lifestyle in black to ring around the patio area. You want to leave those overhanging tips outside the fenced area: so only place the fence where there is a room below.


Next I used the low shrub fence from the base game along the edges of the lower platform, leaving a space at the front for some stairs (which I forgot to add).

You can continue to decorate the exterior of the houses as you like.
Step 14: Shipping Container Interior
If you like, you can use the same exterior wall patterns to cover the inside of each room for a rough industrial look. Make sure to match the interior and exterior colour of each room! If you want to make each container more modern, you can use a range of wall coverings. I like the basic white paint from the base game and the new horizontal wood walls from Eco Lifestyle.
Next you can choose a floor covering. Again, this could be a metal floor or you could make it look like a wooden floor has been laid. Try and think about how each room would be used as you choose wall and floor coverings. Remember, you can always change this later if you change your mind!


Next, add an interior door between the two ground floor rooms. I like the industrial single tile door from Eco Lifestyle. If you added extra units when placing rooms, make sure every room is accessible.

Step 15: Flat Pack Home Interior
While I like to keep the blocky style of the shipping container homes, you can be a bit more creative with the interior walls of the flat pack home. You may have realised by now that you can’t place a double bed with access to both sides in a 3-tile-wide room. So while the container home is good for single Sims, the flat pack home is more suitable for families.
On the ground floor I knock out the wall between the two rooms furthest from the door to create space for a double bed. Then I draw in a wall to close of the far window, this will be a bathroom.


Then I close the other window to make a large rectangular bedroom.

Next, I open the short wall to the front unit for a kitchen/dining area.

Finally, I add a door from the kitchen to the bedroom and a door from the bedroom to the bathroom.


Step 16: Furnishing the Interior
You can do your own thing here! But if you’d like inspiration, here are my screenshots…
Container Home:


Flat Pack Home:


Tip: If you are thinking of building more container or flat pack style homes in the future, try saving each completed room to the gallery so that you can build them more quickly next time!
Step 17: Lot Traits
As a last step, why not add some lot traits to make your Sims lives easier or more challenging! The Eco Lot trait makes it easier to get an eco friendly footprint. Off the Grid means objects that use utilities like water or electricity won’t work unless you generate your own power and collect your own water. I added the Grody trait from City living to make the lot get dirtier faster and you could combine that with the new Reduce and Recycle trait to make your Sims’ new homes extra filthy!

Once you get the hang of building modular homes you could challenge yourself to build a tiny home with the Tiny Living Stuff Pack.

Ta da! That’s it! You are now a tiny home architect extraordinaire! I hope you found this blog useful and maybe picked up a tip or two. If you build any homes using this tutorial I’d love to see a screenshot! You can post them to me on Twitter.
